Preparation
You will need the following tools to complete this process:
- Virtual Machine Hypervisor, such as VMware Player
- SSH client, such as Nutty
- Ubuntu Server disc image
This guide is aimed for Windows users, the rest can probably figure out the parts that have only been described for Windows. These steps are likely to change a little when new versions of VMware Player and Ubuntu Server are released, however generally the default settings are sane and you can just use them when in doubt.
The goals for the guide are:
- To give you a virtual machine running Ubuntu Server
- Set up Node.js and NVM (Node Version Manager) on it
- Set up file sharing with Samba with Windows machines
Not everything described here should be considered "best practice", such as the completely insecure Samba connection. If you are interested on doing things in a better way, I suggest you start browsing the web for more specific guides for every section.
Downloading Ubuntu Server
First step is to figure out if your computer is 32-bit or 64-bit, most modern computers are 64-bit, but you can check this by opening the Windows Control Panel item, "System". It should say something like "System type: 64-bit Operating System", which would tell you it is a 64-bit computer.
Now, go to www.ubuntu.com/download/server, choose the flavor compatible with your system, and click "Start download".
Creating your Virtual Machine
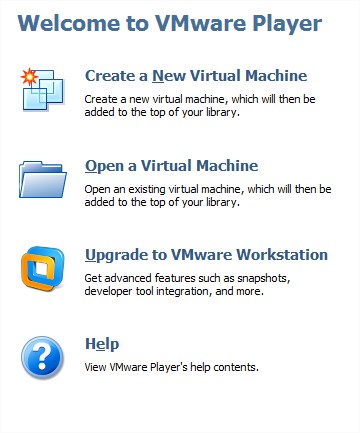
Start VMware Player and click on "Create a New Virtual Machine" on the first screen.
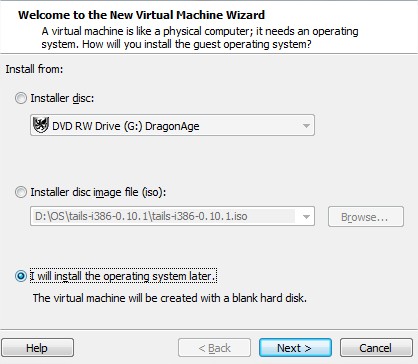
Choose "I will install the operating system later." and click "Next". (Yep, that's Dragon Age: Origins.)
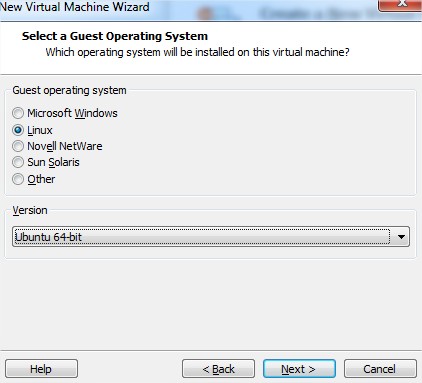
Choose "Linux" as the guest operating system, and for the version choose "Ubuntu 64-bit" if you have a 64-bit computer, otherwise "Ubuntu".
Enter any Virtual machine name you like, I would suggest "nodevm".
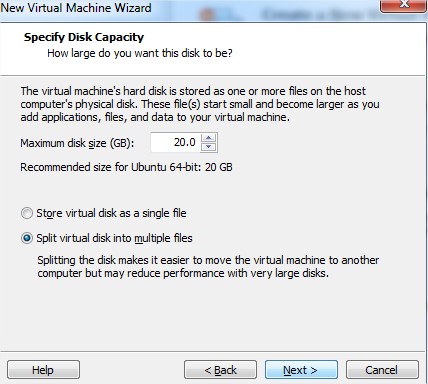
The default Maximum disk size of 20GB is generally more than enough, but if you feel like you need more, just add more. You should be able to survive with as little as 10GB. You can choose either one of "Store virtual disk as a single file" or "Split virtual disk into multiple files", it will not make that much difference. Click "Next" once done with your selections.
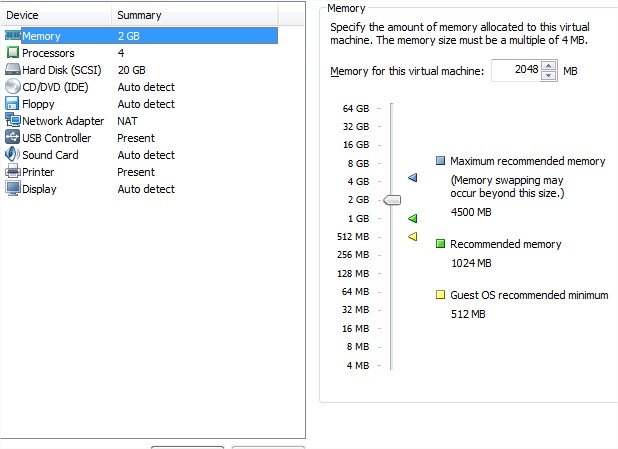
Click "Customize Hardware...". If you have enough RAM, you can increase the amount of memory to 2048MB, if you have little, you can survive with 512MB. Once selected the amount of memory you want, choose "Processors" from the left. You should choose the "Number of processor cores" from whichever is smaller, the number of processor cores you have, or 4. If you don't know, 2 is a good default. Click "Close" and "Finish".
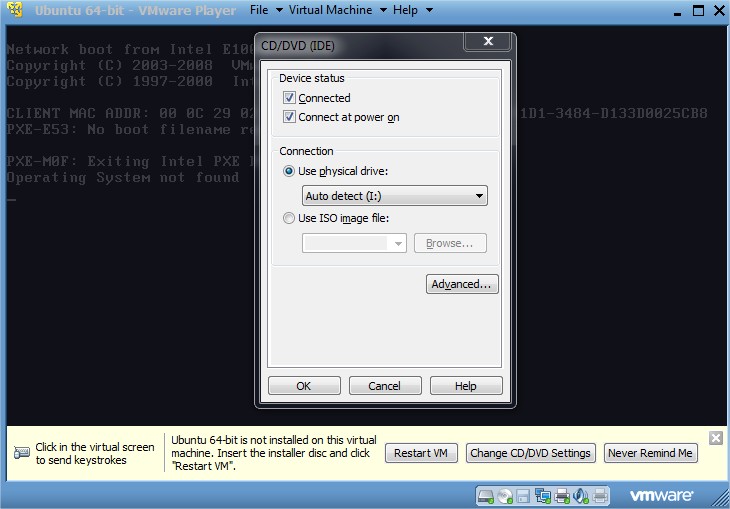
Click on "Play virtual machine" to start it up. Since you have not configured it properly for it to be able to boot into any operating system, you will likely end up with a message saying "Operating system not found".
At the bottom of the window, you should see a dialog telling you that Ubuntu is not installed, click "Change CD/DVD Settings". Choose "Use ISO image file", click "Browse" and choose the Ubuntu Server ISO image you downloaded earlier, and then click "OK".
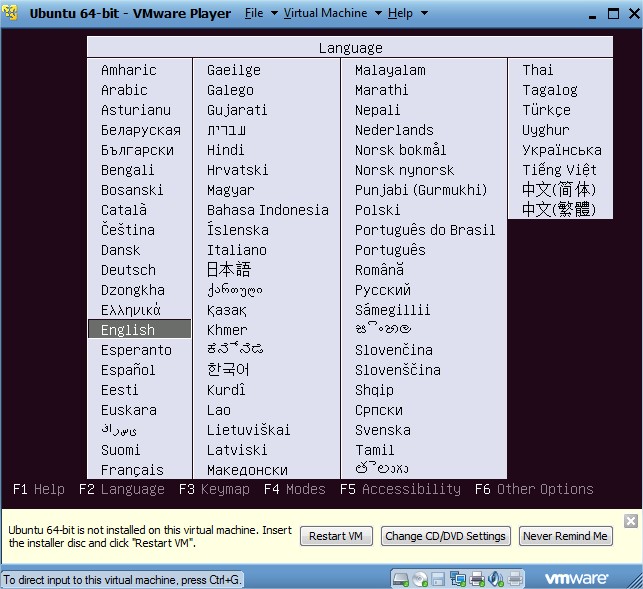
Now click on the middle of the virtual screen, to select the virtual machine, and press "Space" to retry booting from the CD image.
From this point on, if you need to do something outside of the virtual machine, you will have to press CTRL + ALT at the same time to release your keyboard and mouse from the virtual machine, and click on the virtual screen to activate it again.
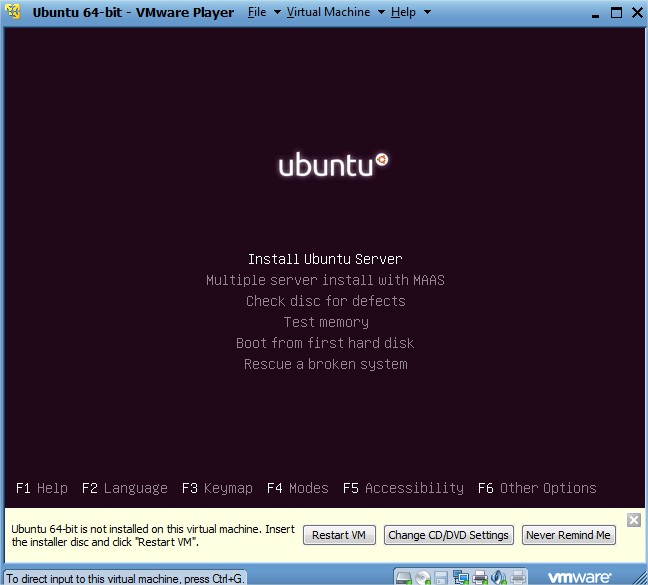
From the first boot screen, press Enter to choose the English language.
Then press Enter again to choose "Install Ubuntu Server"
You're welcomed with a "Select a language" screen, hit enter to choose English again
Choose your location (up & down arrow keys, enter to select)
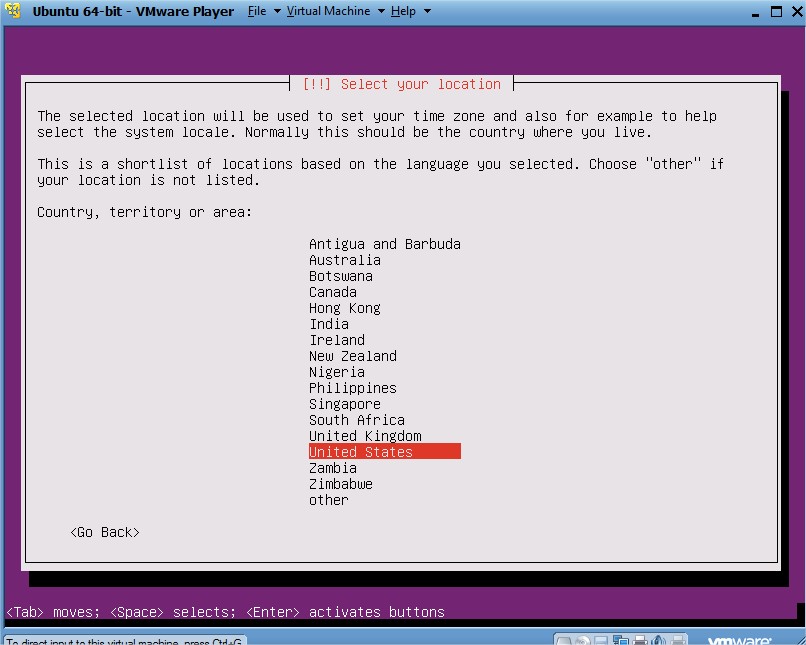
Choose country to base your locales on, these affect localization of time, date, etc. formats, I generally just use "United States". You should probably pick one that says "UTF-8" in the identifier.
Choose not to do the auto-detection of the keyboard layout, or choose to do it, whichever way you want, I would go for no detect and pick mine manually.
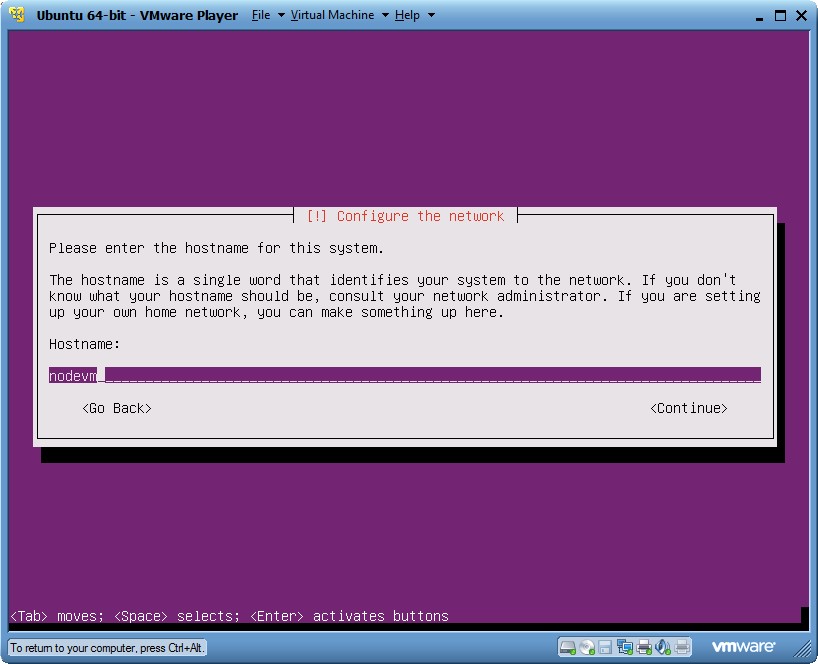
Enter a hostname (a name for your computer in your network), e.g. "nodevm".
Create a user for yourself, make sure you pick a username and password you can remember.
You probably shouldn't encrypt your home directory, as it can cause issues with the file sharing later on.
Configure the timezone, if you chose the correct location earlier, it'll probably have automatically selected the correct one for you.
Choose "Guided - use entire disk and set up LVM", and continue with the default selections until prompted to "Write the changes to disk and configure LVM?".
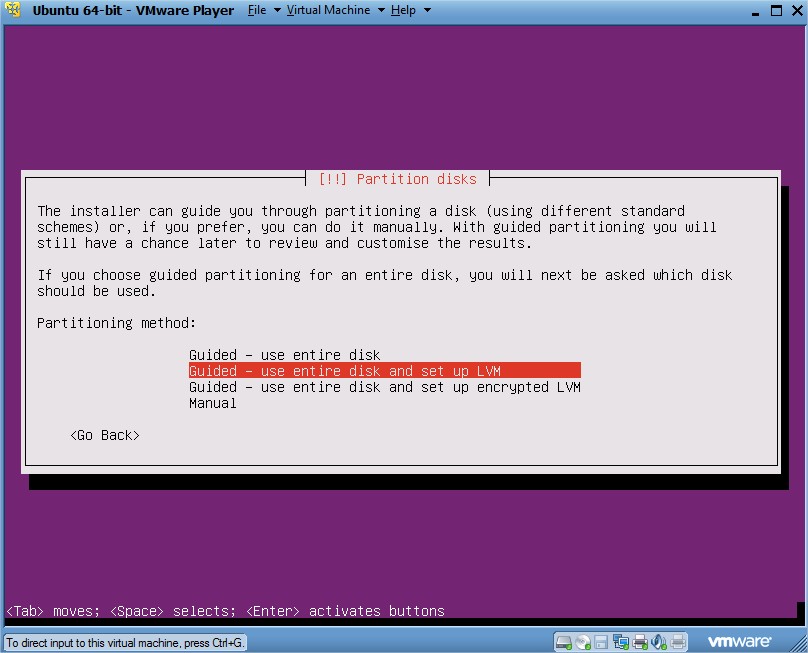
Choose Yes and then accept the default amount to use for guided partitioning.
Choose to Write the changes to disks.
It will now install the base system, shouldn't take too long.
If you absolutely know you need a HTTP proxy, enter the settings on the "HTTP proxy information" dialog, most likely you'll need none and can just press Enter to continue.
Choose to install security updates automatically.
Choose to install "OpenSSH server" (space to select, enter to move on).
Accept to install the GRUB boot loader to the master boot record.
Choose "Continue" to reboot into the installed system.
The virtual machine will now reboot into Ubuntu, just wait a few moments until you get a login screen.
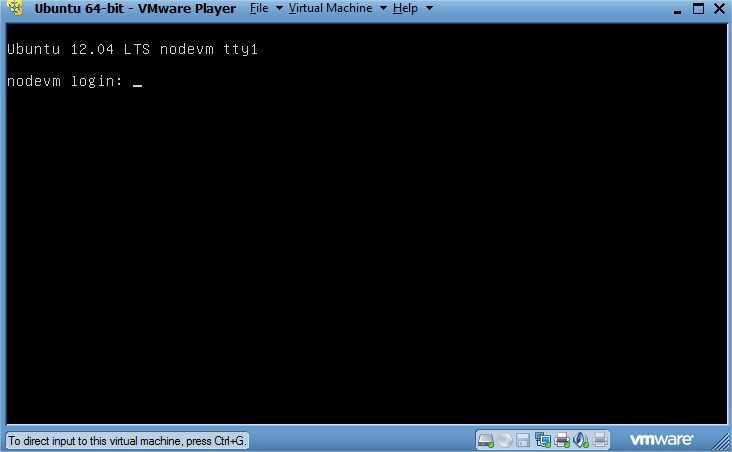
Log in with your user and password.
On the welcome screen, look for "IP address for eth0" and note the IP address, you will be needing this for more convenient communication with your virtual machine, even though it is technically possible to do all of the following from via this console access.
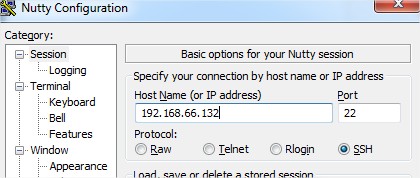
Open up your SSH client (Nutty, if you chose to download that).
Enter the IP address you just got from your virtual machine (probably not the same as mine, so don't blindly copy from the screenshot), save the settings if you want to (give it a name and click "Save"), and then click "Open".
Log in with your username and password.
Once you have confirmed that you can get in, go back to VMware player and press CTRL+D to log out from that console. Go ahead and minimize it (do not close it), and then go back to your SSH client.
Now we will proceed to install any available updates to your system (might take a while), on the SSH client, write the following, and then press Enter:
sudo apt-get update; sudo apt-get upgradeInstalling Node.js
Next install all requirements for building Node.js and at least most modules, as well as Samba for file sharing (might take a while), run the following:
sudo apt-get install build-essential curl libssl-dev apache2-utils git-core sambaNext, to install NVM (Node Version Manager), which we'll use to actually install Node.js, run:
git clone git://github.com/creationix/nvm.git ~/nvm
. ~/nvm/nvm.sh
Please be sure to write every character exactly, as they are all important (copy & paste is likely the best way to do it).
Next we'll actually install Node.js, first go to http://nodejs.org and check what is the latest version. At the moment when this was written, the latest version was v0.6.16, so the commands below are to install it, if you find a newer version, replace "v0.6.16" with the version number and then run (this will likely take a few minutes):
nvm install v0.6.16
nvm use v0.6.16
nvm alias default v0.6.16
This will first install Node.js, then activate Node.js environment for the current session, and then make that version the default version to use.
To activate NVM and Node.js environment for future sessions, first run:
cat >> .bashrcMake sure you have the two > -signs, since just one will clear the contents of that very important file. The terminal is now expecting input to append to the end of the file ".bashrc", write:
. ~/nvm/nvm.shThen hit enter and then press CTRL+C.
Set up file sharing with Windows:
First we'll create a folder to share (this can really be called pretty much anything, as long as you're consistent later in the configuration):
mkdir ~/sourceOpen a text editor for the Samba configuration:
sudo nano -w /etc/samba/smb.confThe text editor is pretty simple, use the arrow keys to move around.
On the next line after where it says "[global]" write:
security = user
guest account = (insert your username here)
E.g., if your user name is "foobar", it should say:
security = user
guest account = foobar
Go to the very end of the file and write:
[source]
	path = /home/(insert your username here)/source
	comment = Source code
	read only = no
	guest only = yes
	guest ok = yes
Again, if your username is "foobar", the "path" -line should say:
path = /home/foobar/sourceExit and save (press CTRL+X, Y, Enter).
Next you need to restart Samba to activate configuration change:
sudo /etc/init.d/smbd restartIf you run into issues, you can try looking for more help at https://help.ubuntu.com/community/Samba/SambaServerGuide#Samba_Server_Configuration_in_terminal
On your Windows Explorer, enter \\(your virtual machine's IP address\) to the address bar (e.g. in my case "\\192.168.66.132\"), enter any random user & password you can come up with (test/test, for example) to trigger guest login.
Right click on "source" (or whatever you decided to call it), and choose "Map Network Drive", choose whatever settings you like and click "Finish".
On the new mapped network drive, create a new file, "test.js" with the contents:
console.log('Hello world');Make sure you save the file.
On the SSH connection, run:
cd ~/source
node test.js
If you see the text "Hello world", you've successfully installed Ubuntu Server and Node.js and congratulations are in order!
You can now continue to write code on your Windows machine, and get the power of Linux. To fool around with nodejs you have the tools "nvm" (Node Version Manager) and "npm" (Node Package Manager), to get help with them, just write the name of the tool on the SSH console and hit enter.
You can just close the VMware player to suspend your virtual machine when you don't need it, but when you do restart it, the IP address might change, so log in and check it again if you're having issues.